

How to Write and Publish a Blog Post on Your Shopify Store
Expert Shopify tips, strategies, and best practices to help you build and grow a successful online store.
How to Write and Publish a Blog Post on Your Shopify Store
Adding a blog to your Shopify store is a brilliant way to engage customers, improve your SEO rankings, and bring more visitors to your site. But if you’re new to Shopify or not very tech-savvy, you might be asking yourself: How do I actually create and publish a blog post? Don’t worry – this step-by-step guide will show you exactly how to write, format, and publish your first post using both the Shopify desktop admin and the Shopify mobile app.
Skip to a specific section:
- Step 1: Access the Shopify Blog Editor
- Step 2: Add a Blog Post Title
- Step 3: Write Your Blog Content & Format
- Step 4: Add a Featured Image
- Step 5: Choose a Blog Category
- Step 6: Add Tags for SEO
- Step 7: Set the Blog Post URL & SEO Settings
- Step 8: Publish or Schedule Your Blog Post
- Step 9: Share Your Blog Post on Social Media
Step 1: Access the Shopify Blog Editor
Desktop
- Log into Shopify (Desktop): Go to your Shopify Admin (e.g., yourstore.myshopify.com/admin) and sign in.
- Navigate to Blog Posts: In the left-hand menu, click Online Store > Blog Posts.
- Create a New Post: Click the Create Blog Post button to open Shopify’s blog editor.
Mobile App
- Open the Shopify App: Download and launch the Shopify app on your iOS or Android device, then log in to your store.
- Go to Store > Blog Posts: Tap the Store tab (or the menu icon), then select Online Store > Blog Posts from the options.
- Create a New Post: Tap the + button or Create Blog Post to start writing your new blog post.
Note: The layout may differ slightly between the desktop and mobile app, but the core functionality remains the same.
Step 2: Add a Blog Post Title
Whether you’re on desktop or mobile, you’ll see a field labelled Title near the top. This is the first thing customers see, so make it engaging and relevant to your topic.
✅ Good Example: “5 Grooming Tips for the Modern Gent”
❌ Bad Example: “New Services Available”
Tip: Keep your title concise (under 60 characters) to avoid it being cut off in search results.
Step 3: Write Your Blog Content & Format
Desktop
On the desktop editor, you’ll see a large text area for your main content. It works like a simple word processor:
- Format Toolbar: Highlight text to apply bold, italic, or create headings and lists.
- Insert Images/Videos: Click the Insert image icon or paste embed codes for videos (e.g., YouTube).
- Visibility & Settings: On the right side, you can toggle Visible or Hidden and set the Featured Image (more on that in Step 4).
- Excerpt (Optional): Some themes show an excerpt on your blog page. If available, fill in a short summary of your post.
Mobile App
In the Shopify app, the blog content field is also a simple text editor, but with fewer formatting options:
- Tap to Type: Enter your paragraphs, lists, and headings directly. For advanced formatting, you may need to switch to HTML view (if available).
- Add Media: Look for an Add Image or Insert button to include photos from your device.
- Excerpt (Optional): Scroll down to find an excerpt field, if your theme uses it.
Example of a Well-Formatted Section:
<h2>Why Our Barber Services Stand Out</h2>
<p>Our barbershop delivers bespoke grooming services using top-notch products and traditional techniques tailored for the modern gentleman.</p>
<ul>
  <li>Skilled barbers with years of expertise</li>
  <li>A relaxed, modern atmosphere in the heart of London</li>
  <li>Customised grooming packages to suit every style</li>
</ul>
Tip: Keep paragraphs short, use bullet points for lists, and consider adding relevant images or videos to make your content more engaging!
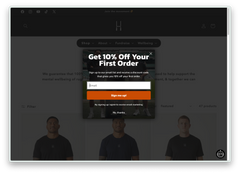
Step 4: Add a Featured Image
Your Featured Image appears at the top of your blog post and in previews on social media or your main blog listing page.
- Desktop: Look for the Add Image or Upload Image button in the Featured Image section on the right. Choose a relevant, high‐quality image.
- Mobile App: Scroll down (or tap Settings in some versions) to find the Featured Image option. Tap to add a photo from your device.
- Alt Text: Always add a brief description of your image for SEO and accessibility (e.g., “Skilled barber at work in a modern barbershop”).
Tip: Use JPEG or PNG format and keep file sizes under 500KB for quicker loading.
Step 5: Choose a Blog Category
Shopify lets you organise your posts into categories (e.g., “News”, “Tips & Guides”).
- Desktop: In the Blog dropdown on the right, pick the category that suits your post. If none exists, click Manage Blogs > Create Blog.
- Mobile App: Scroll down to the Blog field. Tap it to select or create a new category.
Tip: Keep blog categories broad but relevant (e.g., Business Tips, Shop Owner Advice, or Behind the Scenes).
Step 6: Add Tags for SEO
Tags help organise your content within Shopify and can help users find related posts on your site.
- Desktop: In the Tags field on the right, type 3–5 relevant keywords separated by commas (e.g., “barber, grooming, mens hair, UK barbershop”).
- Mobile App: Scroll down or tap Tags to add similar keywords.
Note: Tags don’t directly affect Google rankings, but they can improve navigation within your store.
Step 7: Set the Blog Post URL & SEO Settings
Customising your post’s URL and SEO settings helps it rank better in search engines.
- Desktop: Scroll down to Search Engine Listing Preview and click Edit Website SEO. Adjust the Page title, Meta description, and URL slug.
- Mobile App: Look for SEO or Search Engine Preview in the settings. Tap to customise the title, description, and slug.
- Character Limit: Keep your meta description around 150–160 characters to avoid truncation.
Step 8: Publish or Schedule Your Blog Post
Once you’re satisfied with your post, it’s time to make it live!
- Desktop: On the right, find the Visibility or Publish section. Choose Visible to publish now or Hidden to keep it private. You can also set a future date if scheduling is supported.
- Mobile App: Scroll down to Visibility. Tap Visible to publish immediately or set a publish date if you wish to schedule.
- Click/ Tap Save or Publish: Your blog post will now be live (or scheduled).
Tip: Posting consistently (e.g., once a week) keeps your audience engaged.
Step 9: Share Your Blog Post on Social Media
After hitting publish, promote your blog post to attract more readers! Here are a few ideas:
- Facebook & Instagram: Share a quick caption and eye‐catching image.
- Pinterest: Pin your featured image to a relevant board.
- Email Newsletter: Include a link to your new blog post in your next email campaign.
- LinkedIn & Twitter: Use relevant hashtags and a short teaser to entice readers.
Tip: Use UTM tracking links (e.g., via Google Analytics) to measure how social media impacts your blog traffic.
Final Thoughts
Creating a blog on Shopify doesn’t have to be complicated. Whether you’re on desktop or mobile, the process is straightforward and user-friendly. By following these steps, you’ll be able to write, format, and publish posts with confidence.
Ready for more insights? Stay tuned for our next guide: What to Write About on a Shopify Blog! 🚀
Enjoyed this? Try one of these:
-

Cupán Focail: Reviving the Irish Language One Cupán Caife at a Time
Read More → -

Visit Belfast in July for Belfast Whiskey Week
Read More → -

The Work That Made Us Go All-In on Shopify
Read More → -

A Small Update, A Clear Intention: Our New Events Page
Read More → -

What Belfast Shopify Businesses Really Want (According to Our Clients)
Read More → -

Independent Irish Shopify Studio Values | How We Work at Invisible Building
Read More → -

Looking Back at Magic at Moira: 10k Views, The Santa Run, and Building Something That Lasts
Read More → -

10 Shopify Design Patterns Every NI, Irish & UK Business Should Steal in 2026
Read More → -

Free Shopify Training in Northern Ireland: How to Skill Up with Go Succeed
Looking for free Shopify training in Northern Ireland? Go Succeed offers funded expert worksho...
Read More → -
Shopify SEO Tips for Northern Ireland Businesses
Read More → -
From Wix to Shopify: Why It’s Time to Level Up Your Store
Read More → -

Smart Shopify Websites: How Invisible Building Uses AI to Power Performance, Design & Growth
Read More → -

Northern Ireland Shopify Success Stories: 5 Brands That Sailed Past £1 Million
Read More → -

15 Must-Ask Questions Before You Hire a Shopify Developer (+ Free Checklist)
Read More → -
How to Source Products for Your Shopify Store in NI?
Read More → -
Inside the Build: 4 Case Studies from Invisible Building
Read More → -

How We're Using ChatGPT and AI to Boost Creativity and Output at Invisible Building
Read More → -
111 Songs to Get You Motivated While Working
Read More → -
Belfast drone footage meets creative strategy
Read More → -

From CSS to Stud Walls: Invisible Building Goes Full Bauhaus
Read More → -
What to Post This Month: NI Social Media Calendar for April 2025
Read More → -
The Ultimate NI Small Business Toolkit
Read More → -

How Shopify Store Owners Can Use what3words to Improve Deliveries and Customer Experience
Read More → -
How New Businesses Can Use AnswerThePublic to Grow
Read More → -
The NI Business Facebook Group
Read More → -

E-Commerce Trends and Best Practices for Northern Ireland Shopify Businesses (2025)
Read More → -

Valentine’s Day Shopify Success: Tips & Inspiration
Read More → -

Content Marketing Ideas for Shopify Stores in 2025
Read More → -
Turn Swipes Into Stories - How to Make an Instagram Carousel Feel Like an Animation
Read More → -

Mapping User Journeys: Charting the User Experience
User Journeys Maps: User Journeys Maps are a wa...
Read More →


